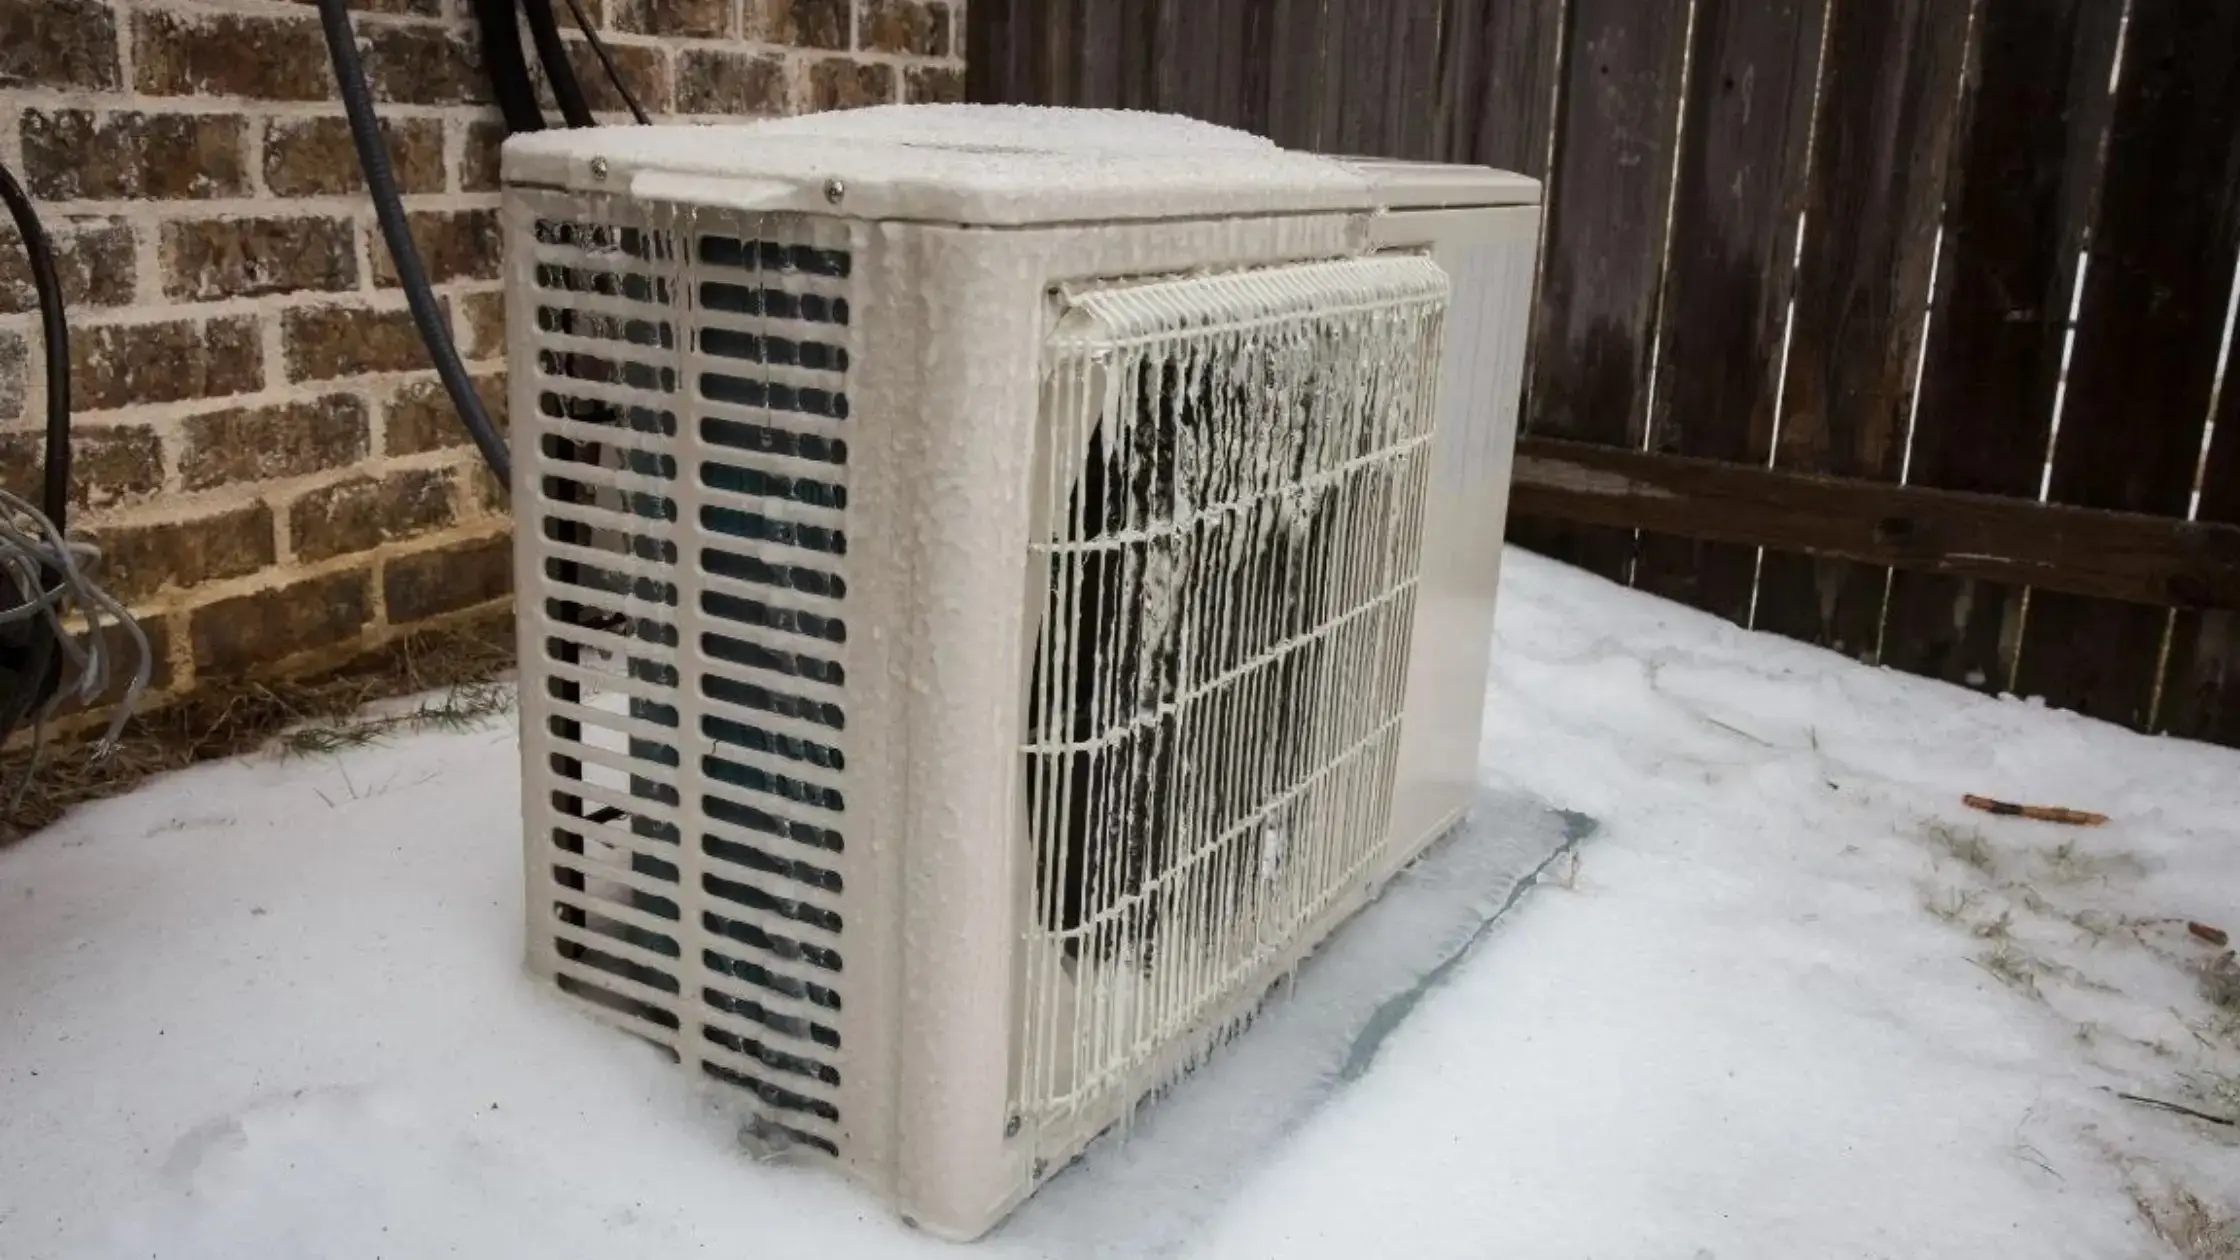
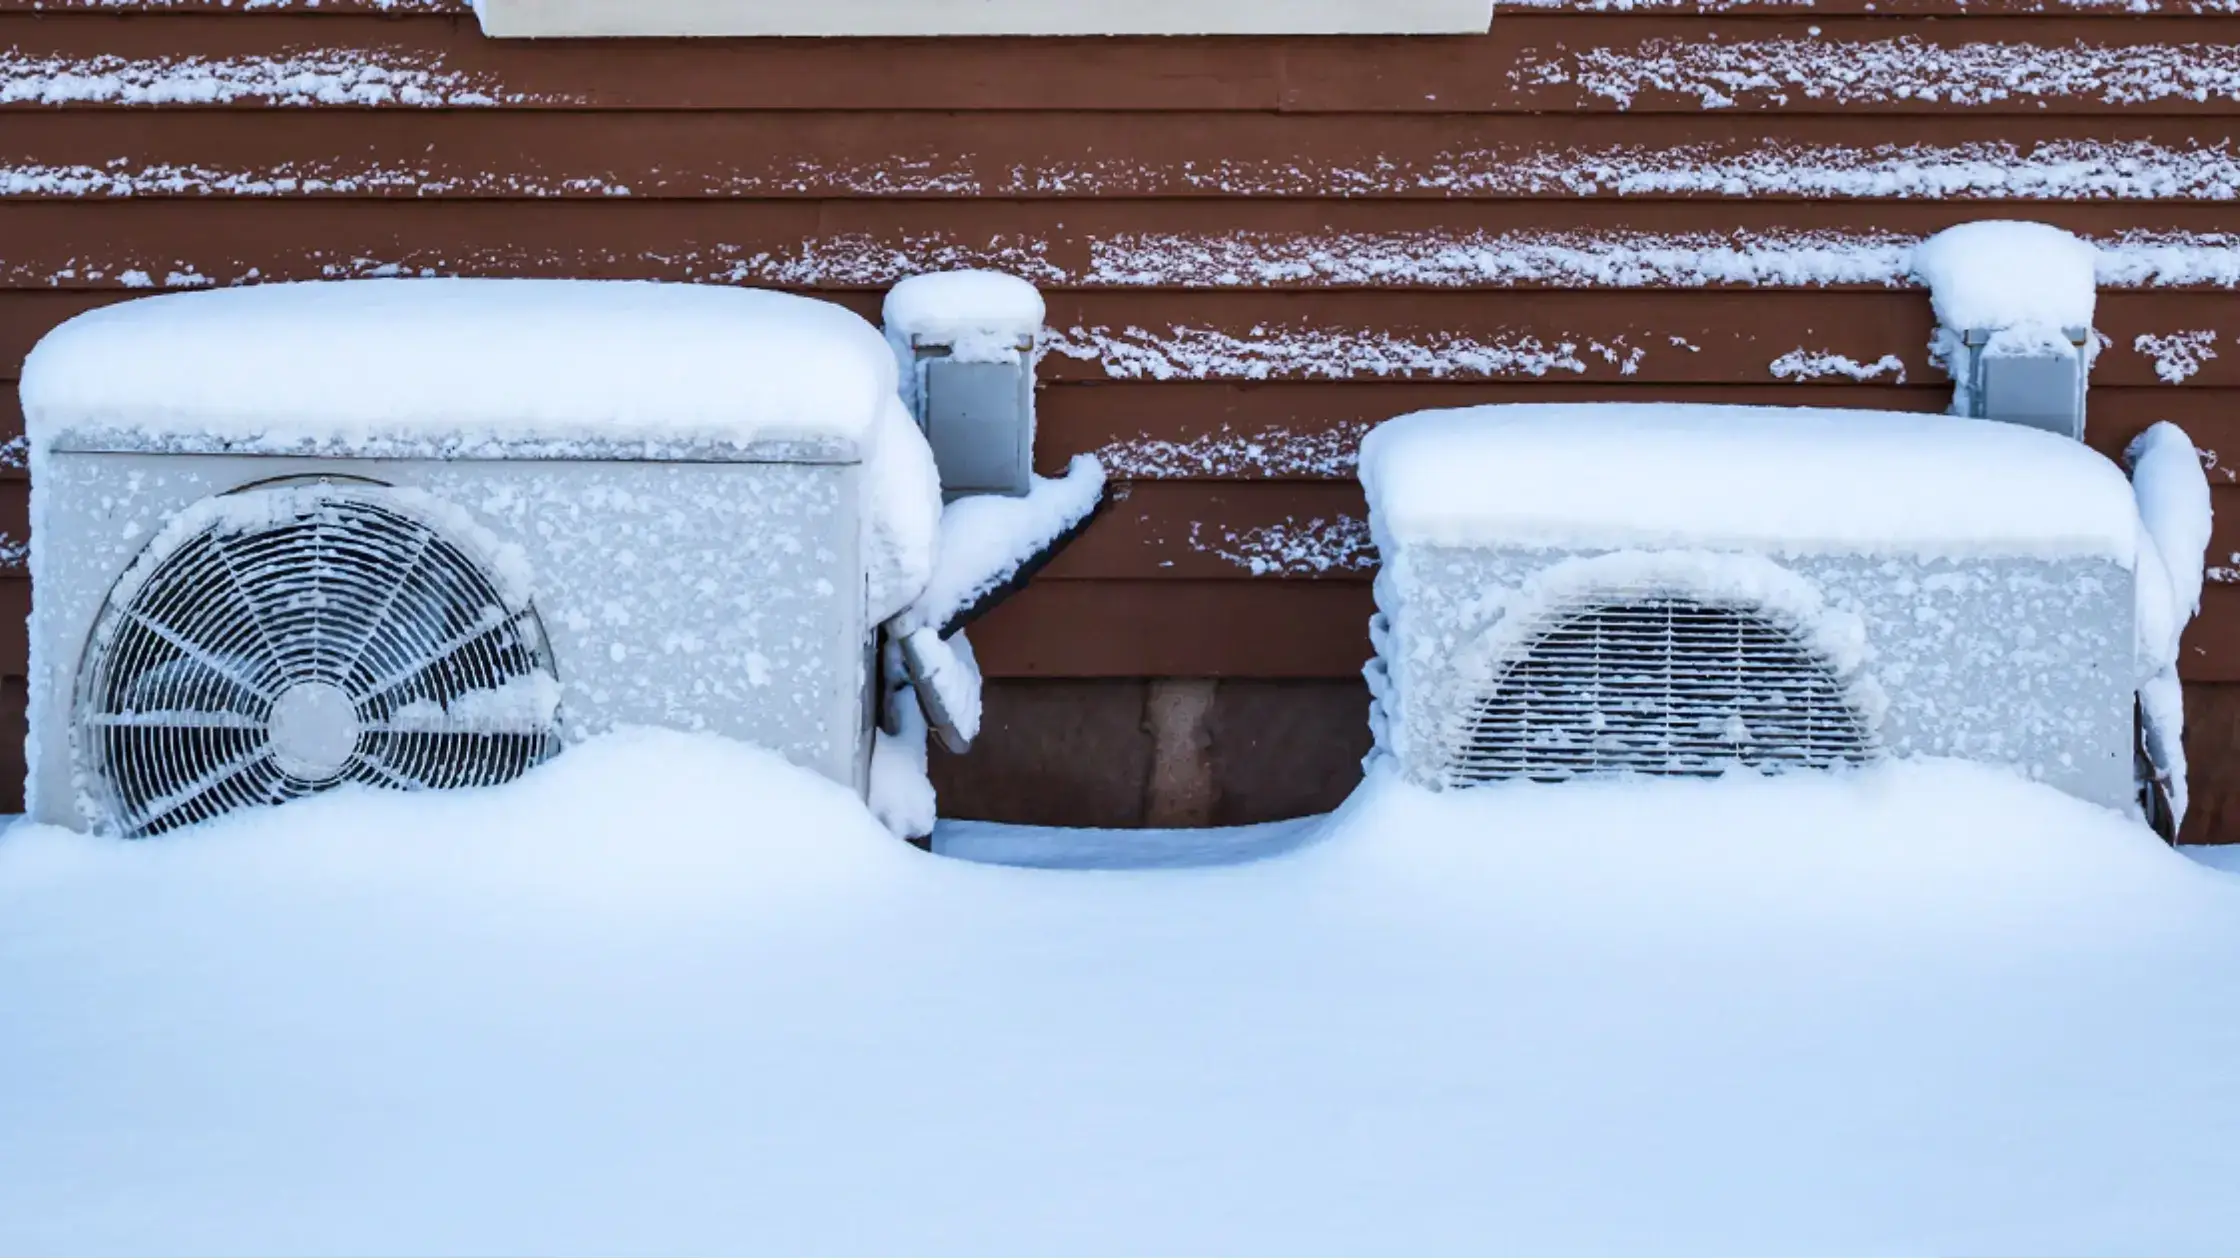
As temperatures drop, your mini-split heating and cooling unit starts building up interior ice that may hamper its effectiveness. Although scratching off the frost with an ice scraper yourself might be tempting, Our article will clarify the ideal moment to consult a professional. Browse and be informed enough to make the best decision for your house and unit, and utilize our mini-split sizing calculator for accurate system selection.
MRCOOL E Star DIY 4th Gen 18k BTU Ductless Mini-Split Heat Pump Complete System - 208-230V/60Hz

$2,156.00
E Star DIY 4th Gen 18k BTU Ductless Mini-Split Heat Pump Complete System - 208-230V/60Hz The MrCool 4th Generation DIY 18K BTU, 22 SEER Ductless Heat Pump system offers a complete solution to your home’s heating and cooling needs. This… read more
Why Does Ice Build Up in Mini-Splits?
Ice accumulation in mini-split units occurs due to a few factors:
Excessive Moisture
-
The primary cause of ice buildup is that there is excess humidity where the mini-split unit is operating. The warm air contains more moisture than the cold air. As it cools, the warm air will condense and freeze on the mini-split unit’s coils. This is problematic, particularly in places like basements, attics, or garages that are not adequately insulated or weatherized.
Improper Drainage
-
There are times when ice forms because of a drain line that has been clogged or improperly installed. Condensation which occurs on its coils should drain out of it through a drain line. If this drain line is blocked or wrongly fixed, water will fail to come out and rather freeze over its coils. All you need to do to fix this problem is check and clear the drain line, if necessary reinstalling it at certain angles.
Refrigerant Issues
-
Another reason for this is low or bad refrigerant levels. This coolant absorbs heat from the air and cools the coils. When there is too little coolant or leakage, the system does not cool properly, increasing the likelihood of ice formation. It is also recommended to have an expert check if there are any leaks in the system as well as run tests on refrigerant levels.
Thermostat Settings
-
Incorrect settings of the thermostat that call for more cooling than can be done by the unit may cause ice build-up. Lowering your thermostat setting to a moderate temperature will help you avoid overworking the unit. It is also important to avoid changing your thermostat settings often.
MRCOOL E Star DIY 4th Gen 24k BTU Ductless Mini-Split Heat Pump Complete System - 208-230V/60Hz

$2,502.00
DIY 4th Generation E Star 24k BTU Ductless Mini-Split Heat Pump Complete System 208-230V/60Hz The MrCool 4th Generation DIY 24K BTU, 20.5 SEER Ductless Heat Pump is an all-in-one system that seamlessly combines efficiency, durability, and simplicity. This system can… read more
Preventing Ice Buildup in Mini-Splits
To prevent ice buildup in mini-split units, several precautions should be taken. These include:
Maintain the Unit
-
In mini splits, routine maintenance is important for preventing ice accumulation. The filters must be checked every month and changed if they are dirty so that proper airflow can be maintained. Dirty or clogged filters decrease efficiency and cause ice to form. In addition, it is important to periodically clean out outdoor units’ coils and fins which serve as a home for dirt accumulation. Any frosting on evaporator coils should be melted away immediately to prevent damage to your system while checking drain lines leading from the indoor air handler ensures proper condensation removal at all times. Clogs in the drain line allow water to pool, increasing the chance of ice buildup.
Optimize Settings
-
The mini-split settings should be optimized for efficiency and less ice. Set the fan speed to auto or high to keep the air moving. It should not be set more than 5 degrees below the current room temperature. If you set the temperature too low, it will run unit excessively and this may cause ice formation. The timer function can also be used to turn off the unit during a specific time each day when no one is in so that coils have a chance of defrosting. Reducing the use of supplemental heat such as space heaters is important because it can affect the performance of a mini-split negatively.
Stealth Comfort 18,000 BTU 20 SEER ACiQ Single Zone Wall Mount Mini Split System

$1,799.00
Stealth Comfort 18,000 BTU 20 SEER ACiQ Single Zone Wall Mount Mini Split System Enhanced Comfort ACiQ Single Zone mini split systems provide precise temperature control, near silent operation, and maximum efficiency at a competitive price. ACiQ systems complement your… read more
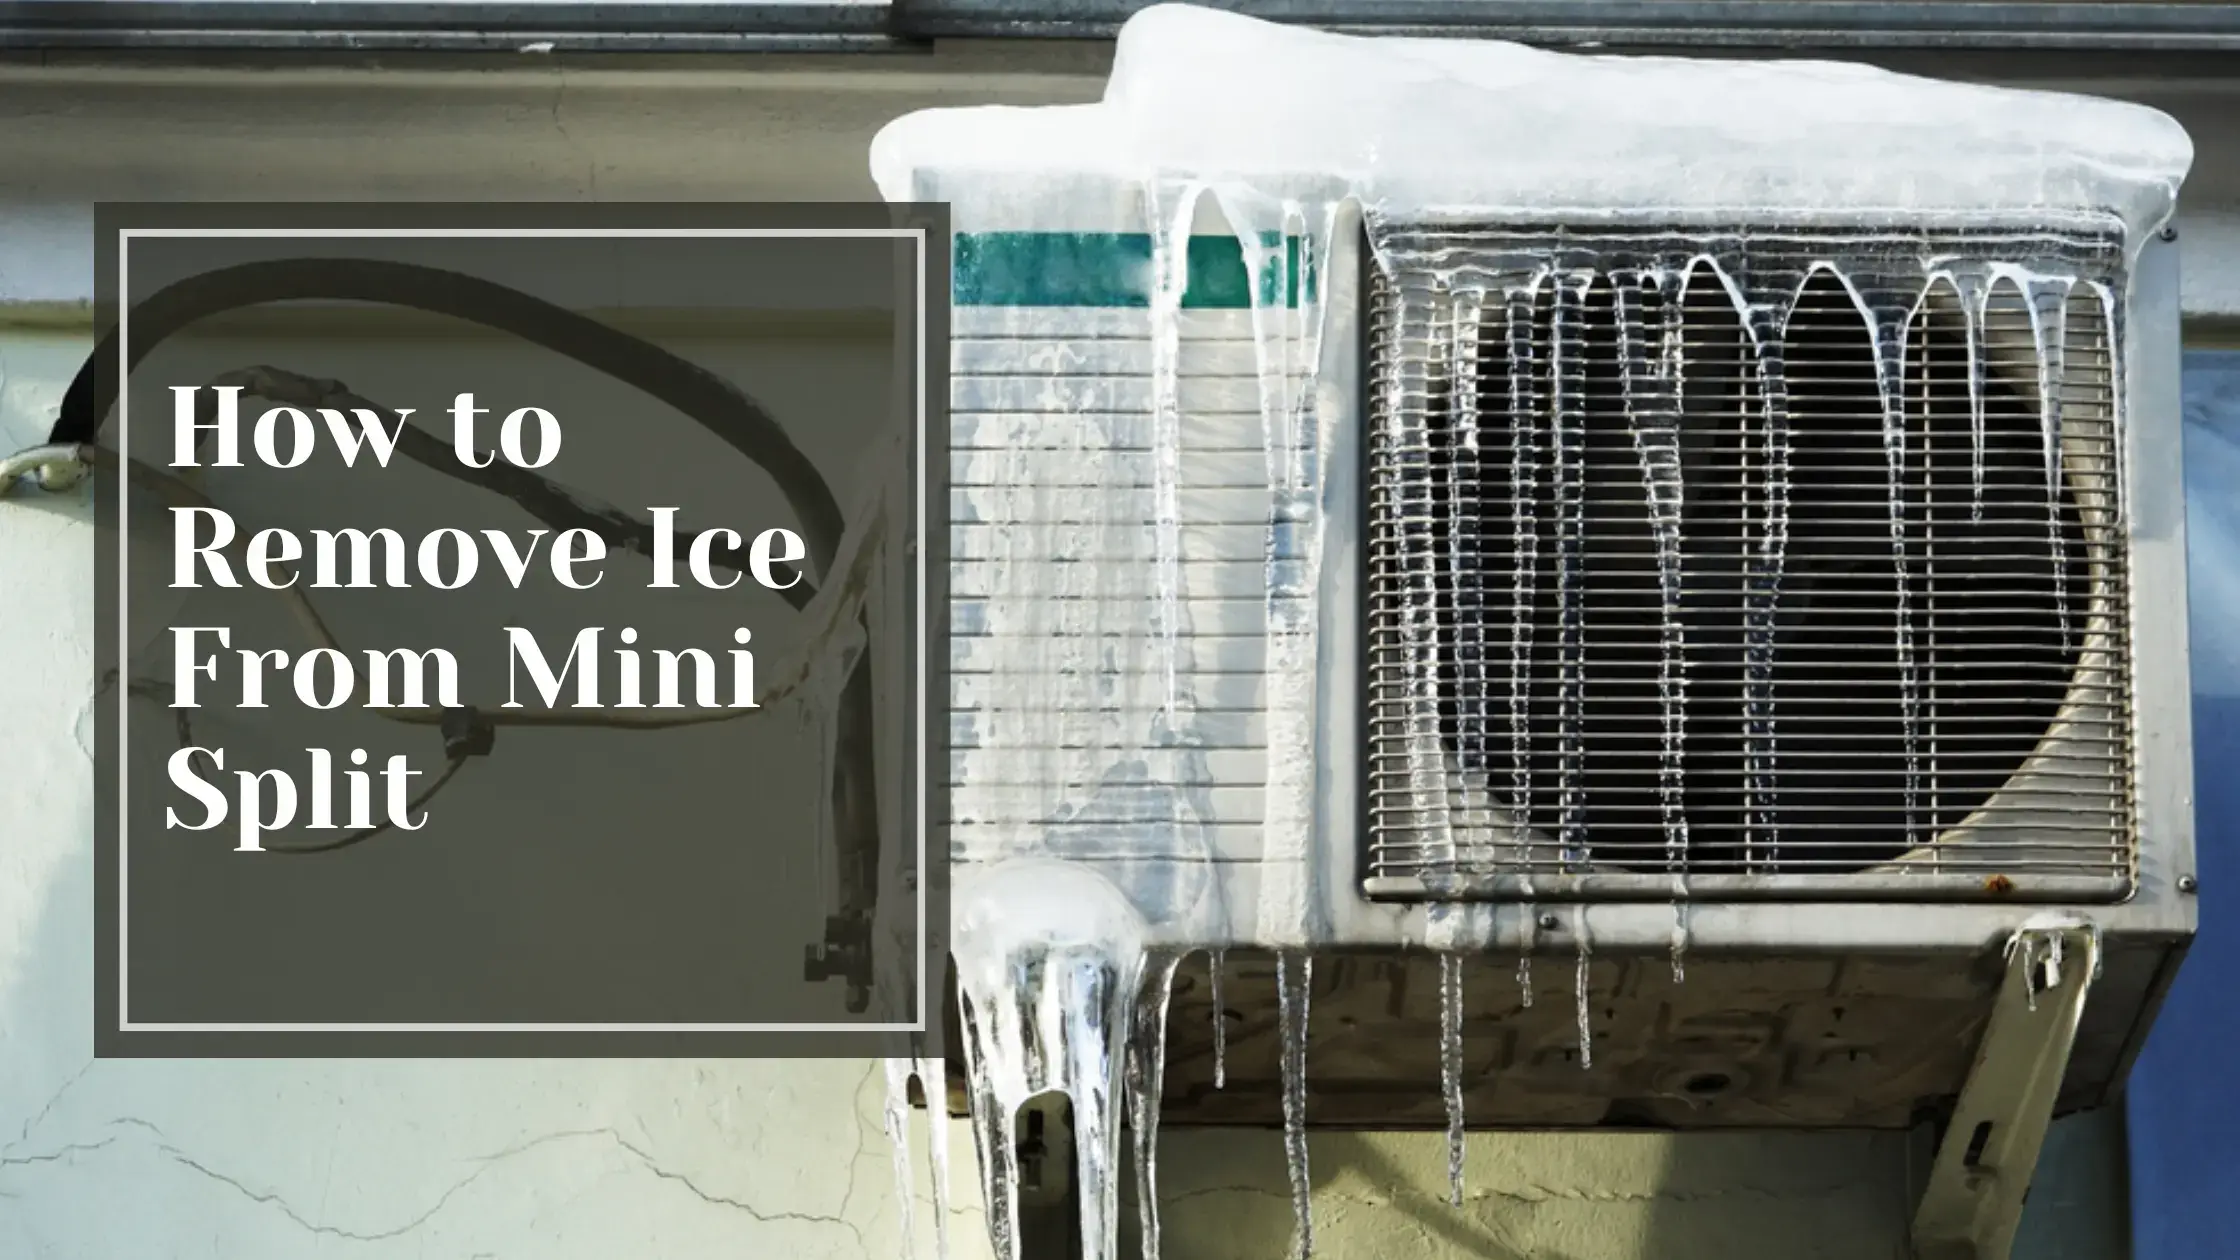
Removing Ice From Your Mini-Split DIY
Once ice has formed on your mini-split’s outdoor unit, it must be removed immediately if its operation is to remain efficient. You can either take care of the removal yourself or call an HVAC expert for assistance with this issue. Removing it yourself saves money but runs the risk of component damage if done improperly. A technician is trained properly and has appropriate tools and safety equipment to thoroughly remove ice while safeguarding the unit.
Gathering Supplies
-
To remove ice yourself, you will require the following: a spray bottle filled with water or antifreeze, towels, a plastic scraper, gloves, eye protection, and a ladder for units installed high up. Spray it so that ice becomes loose then use scraper and towels to break off chunks and wipe away. Repeat this until you remove all ice. Be cautious when on the ladder and wear safety gear.
Resetting the Unit
-
Resetting your mini-split is necessary after clearing all ice. Find the circuit breaker for the unit and switch it off before turning it back on again to reset it. It restarts the unit so that it detects outdoor temperature properly again and resumes normal operation. This would assist in avoiding continued icing up of the unit, inefficiency, or eventual damage.
Considering Professional Help
-
If removing ice seems difficult or time-consuming, hiring an HVAC technician is recommended. A professional has all the necessary tools, training, and experience needed to clean your mini-split out of a buildup of ice without breaking parts. They can also check if there are any loose ends by checking why there could be frequent developments of ice on your system henceforth they should fix them to improve efficiency and minimize chances of reoccurrence. The cost incurred in hiring a professional’s service for ice removal as well as unit inspection may be at times regarded as worthy because this could also increase its durability lifespan.
Calling in a Professional for Mini-Split Ice Removal
Elimination of Safety Hazards
-
Hiring an HVAC professional to take away ice that has built up in the mini-split systems is one way of ensuring effective and safe removal. These professionals have received adequate training, possess relevant certifications, and own the right equipment for removing ice without causing harm or any form of danger. This means that if someone tries using a “do it yourself’ method such as DIY processes can cause falls leading to injury to themselves from electrical shock, and hazardous chemicals exposures among many more. Professionals get rid of these risks by putting on protective gear, stabilizing the scaffoldings, and shutting off power to the system during service.
Thorough Cleaning and Inspection
-
In this regard, an HVAC professional will remove existing ice build-up and clean out and inspect the minisplit system to identify a possible issue with icing which would be further repaired or adjusted. They can check the thermostats, valves, pumps, or fans to ensure they are working well. At the same time, they will look for any leakage points or blocked passages in refrigerant pipes that might lower down its efficiency or make it operate below par. Such adjustments prevent the recurrence of the accumulation of ice.
Restoring Optimal Performance
-
A mini-split cannot effectively heat or cool when there is an ice build-up; energy gets wasted hence increasing costs. The unit’s performance will be optimized through different activities done by an HVAC technician like removing accumulated ice among other things which include cleaning coils as well as filters and monitoring refrigerant levels before making repairs that may be necessary. They can also recommend system upgrades or provide ideas on how to fix outdated systems. Professional maintenance ensures comfort is enhanced while the efficiency and lifetimes of mini-splits are optimized.
How to Remove Ice From Mini Split
While getting rid of accumulated ice from your mini-split may seem like an easy DIY task, it could be quite intricate. Trying to hack at the ice on your own will damage the fragile copper coils as well as the fan blades. This might lead to bigger and more expensive issues in the future. To restore its peak performance through proper diagnosis of the root cause of such ice build-ups, hire an HVAC technician who will do their best. Though costly at first sight having this repair done by a professional is worth every penny as it saves you time and money in the long run bringing relief from all migraines that come with doing it yourself unnecessarily. So entrust this operation into the hands of professionals and get your mini-split working back smoothly towards a cool breeze inside your home.